Zipp AXS Wheel Sensor Setup
This article will walk you through the setup process for Zipp wheels equipped with the Zipp AXS Wheel Sensor.
The Zipp AXS Wheel Sensor is only compatible with the supplied valve stem and the Zipp AXS Wheel Sensor tube with the compatible valve stem. Do not modify the air valve in any way.
A traditional tube with a threaded valve may be used with a wheel equipped with a Zipp AXS Wheel Sensor; however, the air pressure sensor will not function.
The Zipp AXS Wheel Sensor is compatible with tire inserts.
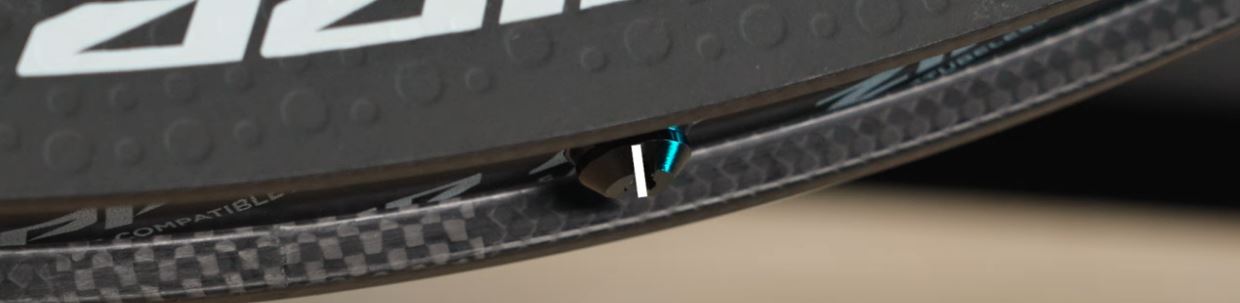
The slot at the base of the tubeless valve stem must be installed perpendicular to the tire bed for the sensor to function properly with tire inserts.
Remove your new Wheels from the box.
New sensors are shipped with a battery insulator that must be removed prior to use.
Ride Ready wheels with tires already mounted will not have an insulator.
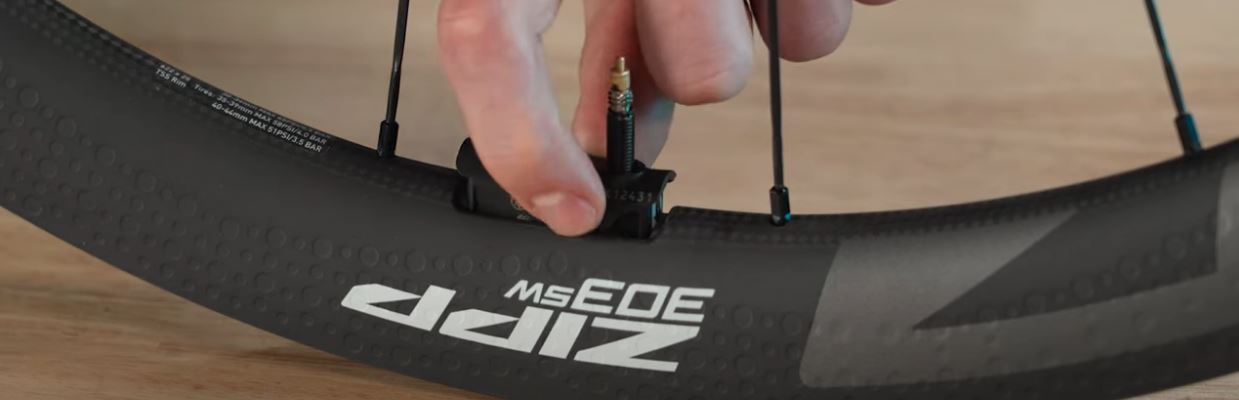
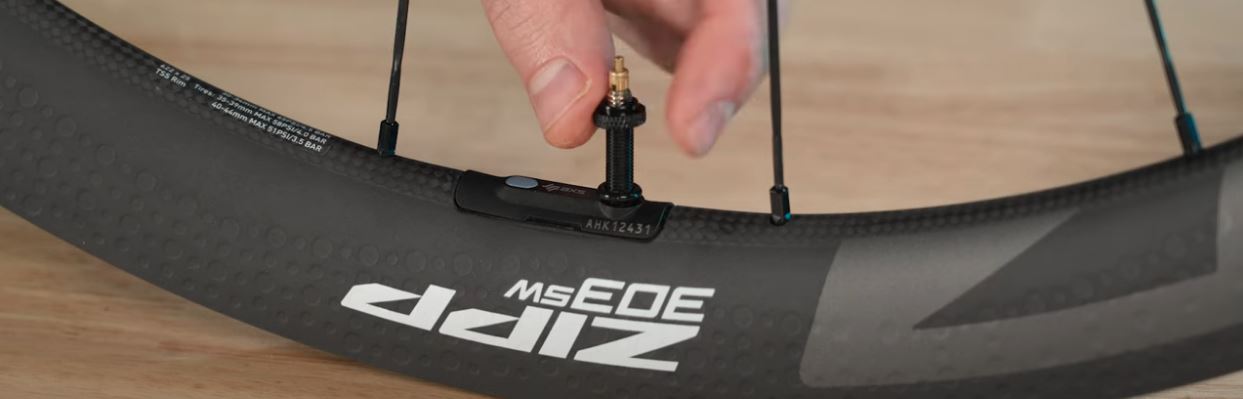
Remove the knurled nut and o-ring from the valve stem.
Firmly hold the wheel sensor by the finger grabs and lift up on the sensor to remove it from the wheel.
Do not remove the valve stem without unseating the wheel sensor.
If the valve stem is removed while the wheel sensor is seated, the valve stem o-rings could be damaged.
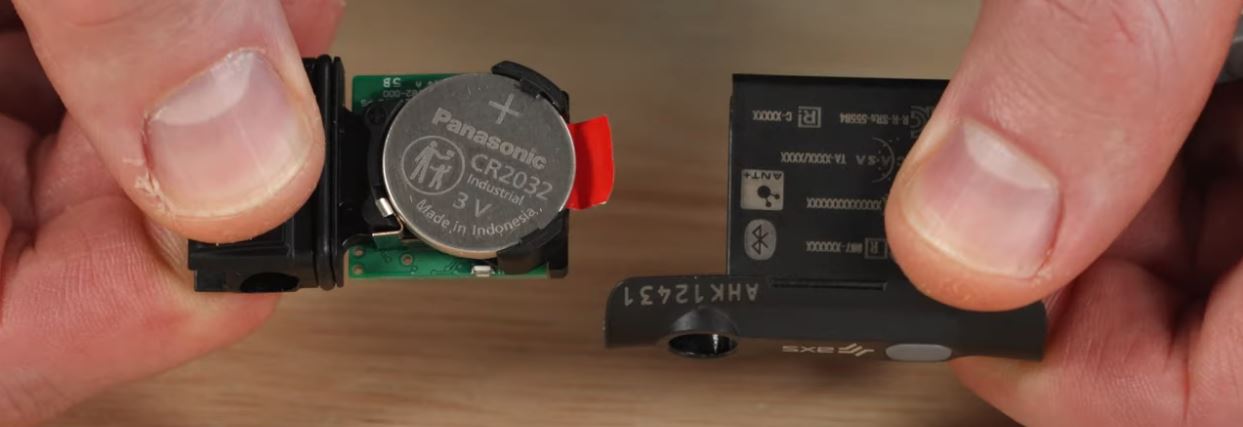
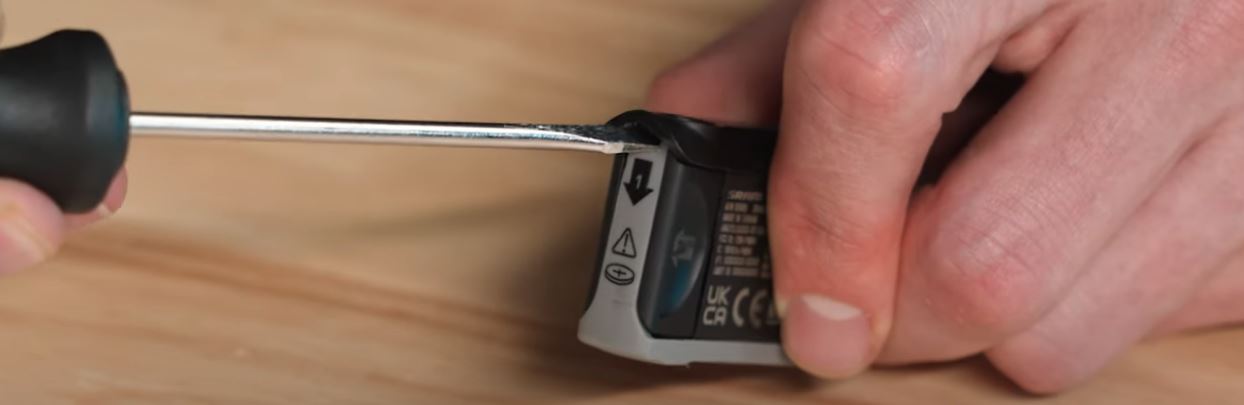
Use a small flat head screwdriver or similar tool to pry open the sensor battery latch and rotate the latch away from the battery tray.
Remove the battery tray from the sensor. Remove the insulator.
Install the battery tray into the sensor. Close the sensor battery latch. Align the stem hole of the wheel sensor with the valve stem and press the sensor into the rim being careful to avoid excess force as the sensor engages the o-rings on the valve stem. Install the o-ring and knurled nut onto the valve stem assembly.
Firmly press on the base of the valve stem while tightening the knurled nut for a proper seal.
Do not overtighten. Do not use a tool to tighten the knurled nut, it must be hand tight only. Install the tire on the wheel if not already installed.
For tubeless tire and sealant installation, sealant should either be poured directly into the tire before seating the tire or the Zipp Sealant Injector must be used.
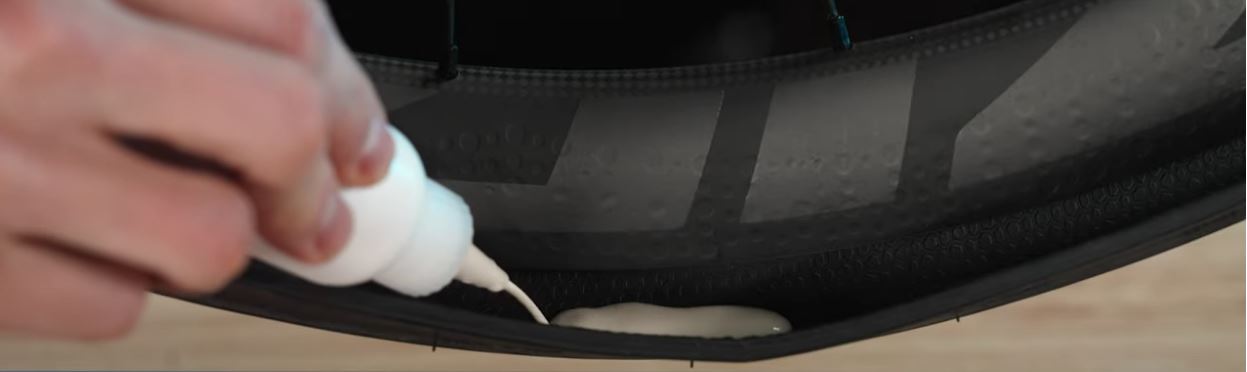
WARNING: Pouring sealant directly into the valve or using a different injector can cause damage to the sensor or clog the valve.
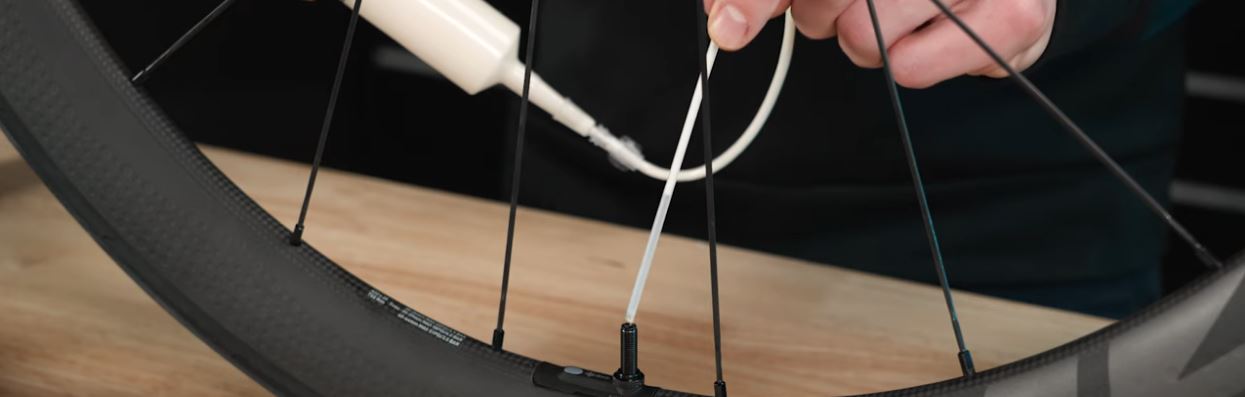
The Zipp Sealant Injector allows sealant to be injected past the valve, directly into the tire. Install sealant with the ZIPP Sealant Injector.
WARNING: DO NOT install sealant through the valve without the injector tool. This will plug the valve hole sensor rendering the sensor ineffective. Alternatively a Zipp AXS Wheel Sensor tube may be installed. Reference the ZIPP Road Wheels User Manuals for more information.
Apply a thin layer of grease to the o-rings on the Zipp AXS Wheel Tube before installation. Remove any excess grease before installation.
A traditional tube with a threaded valve may be used with a wheel equipped with a Zipp AXS Wheel Sensor; however, the air pressure sensor will not function.
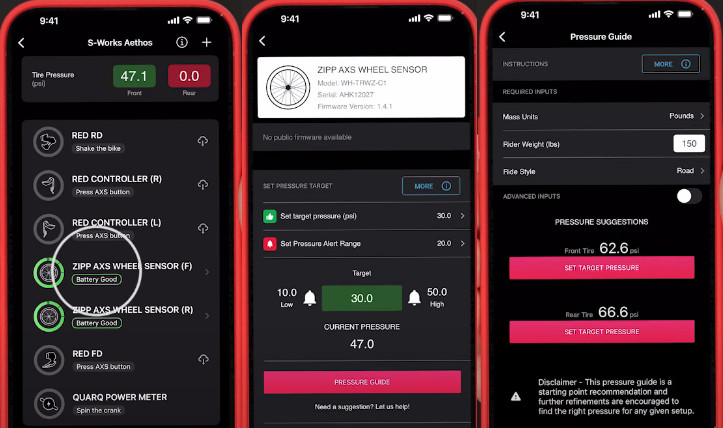
The wheel sensor must be on to connect to the app. Turn the wheel one rotation to turn the wheel sensor on. The wheel sensor will turn off automatically when idle for 10 minutes.
Use the Zipp Air Pressure guide to determine ideal air pressure and set the pressure range for the Zipp AXS Wheel Sensor.
The LED Lights up to indicate tire pressure status. The LED will flash on motion (shake) of the wheel. Slow red flashing: Low tire pressure is detected. Fast red flashing: High tire pressure is detected. Slow green flashing: Tire pressure is within Rider set range. The tire does not need to be removed to replace the battery. Make sure the rim is clean before removing the wheel sensor. Use a damp cloth to wipe off any dirt and debris from the rim and sensor. Clean the components with soap and water only. Rinse thoroughly with water and allow the components to dry completely before opening.
Loosen the Presta valve and release the air pressure from the tire. Remove the knurled nut and o-ring from the valve stem. Firmly hold the wheel sensor by the finger grabs and lift up on the sensor.
Battery Replacement
Make sure the wheel sensor is clean before opening the battery latch. Use a damp cloth to wipe off any dirt and debris from the sensor. Clean the components with soap and water only. Rinse thoroughly with water and allow the components to dry completely before opening. Use a flat head screwdriver to open the sensor battery latch and rotate the latch away from the battery tray.
Remove the battery tray from the sensor. Remove the battery from the battery tray. Install a new CR2032 battery with the positive end (+) facing up. Install the battery tray into the sensor. Close the battery tray latch. Align the stem hole of the wheel sensor with the valve stem and press the sensor into the rim being careful to avoid excess force as the sensor engages the o-rings on the valve stem.
If the valve stem o-rings are dry, apply a thin layer of SRAM Butter or other o-ring grease to the two o-rings before reinstalling the wheel sensor. Remove any excess grease before installing the valve stem into the rim.
Install the o-ring and knurled nut onto the valve stem assembly. Firmly press on the base of the valve stem through the tire while tightening the knurled nut for a proper seal. NOTICE: Do not overtighten. Do not use a tool to tighten the knurled nut, it must be hand tight. Inflate the tire to the pressure recommended by the SRAM AXS app.
Zipp AXS Wheel Sensor Maintenance
Clean the wheel with mild soap and water. Allow the wheel to dry completely before reinstalling the sensor. Remove the sensor from wheel. Remove the battery tray from the sensor.
Gently clean the o-ring and exterior portion of the tray.
Do not clean the Printed Circuit Board Assembly area of the tray where the battery is installed. Check the condition of the battery tray o-ring. Replace the o-ring if it is damaged. Add a thin layer of SRAM butter or other o-ring grease to the battery tray o-ring. Reinstall the battery tray into the sensor and confirm the LED on the sensor comes on. Carefully clean the valve stem hole in the sensor with a q-tip and isopropyl alcohol. Do not scratch the valve stem hole.
Remove the valve stem from the wheel. Remove the valve core and remove any dried sealant from the valve stem. Wash the valve stem with mild soap and water. If any sealant is still in the stem, use water and a nylon bristled pipe cleaner to gently clean inside the stem. Rinse with water. Remove any sealant from the sensor holes between the o-rings. Forced air can be used to remove dried sealant. Check the condition of the valve stem o-rings. Replace the o-rings if they are damaged. Check the condition of the conical seal at the base of the valve stem. Replace the seal if it is damaged or deformed
Check the condition of the knurled nut and o-ring. Replace the o-ring if it is damaged.
CAUTION - Air Loss: The rim hole must be free of any debris (tubeless tape, tubeless sealant, etc.) before the stem assembly is installed.
Debris can prevent the system from correctly monitoring tire pressure or damage the valve stem o-rings leading to air loss.
CAUTION - Air Loss: Use an X-acto knife or similar tool to remove excess tape in order to avoid damage to the valve stem o-rings.
If the valve stem o-rings are dry, apply a thin layer of SRAM Butter or other o-ring grease to the two o-rings before reinstalling the wheel sensor. Remove any excess grease before installing the valve stem into the rim.